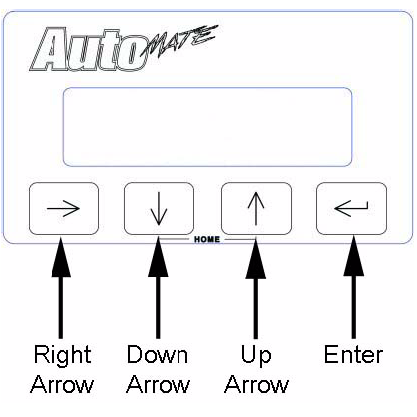
Note - If you not familiar with the Automates menu, follow the links below.
Automate Menu
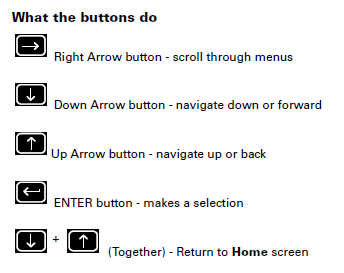
Automate Button Configuration
1. Section Configuration Menu
First item you will want to set up is your Section Configuration.
A) Go to your Section Configuration menu and set up the # of Sections and Sctn widths for your application.
B) Set up your Fore/Aft Offset for your antenna. This is the distance between your antenna and your application point.
C) Set your Auto Section Locate to "YES".
2. Controller Configuration Menu
Next you will want to set up your Controller Configuration
A) First set Control All Sections to "YES".
B) Set your ON Look Ahead and OFF Look Ahead to the desired times. (You can adjust this accordingly at any time) A good starting point is 1.5 seconds on the ON Look Ahead and .5 on the OFF Look Ahead.
C) Set your Percent Coverage. (Most likely will need to be set at 100%)
3. System Configuration
Now you will want to set up your System Configuration
A) You will want to make sure that your Console Port is set to "NONE".
B) You will want to set your Lockout Changes to "OFF".
C) If you have an external master switch, you will want to have your Master Switch set to "External". If you do not have an external master switch, you can set the Automate to use the "Enter" button as your Master Switch.
D) You will also want to set your Mode Selection to fit your application. (Sprayer/Planter etc.)
4. Starting a New Job
A) When you are ready to start a new job: press on the down arrow, press on the "Enter" button, press on the up arrow so that the Start a New Job menu is flashing "YES", and press the "Enter" button.