Calibrating eTurns
WARNING! Due to potential for damage to machinery if using a larger implement with the calibration data recorded for a smaller implement, you need to recalibrate eTurns for different implements. When making the left and right turns during eTurns calibration, make the minimum radius turns possible for the current implement.
To calibrate eTurns:
1. Create or load the preferred vehicle and implement.
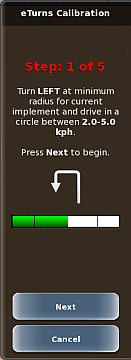
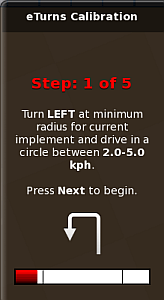
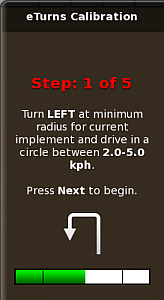
2. Press Menu > Implement Profiles > Current Implement > Calibration. The first eTurns Calibration panel
appears (far left panel below, Step: 1 of 5).
From this point on MAX guides you through the calibration process using a series of panels, with each panel being
a step in the process. Each panel clearly states (in red) the step you are on and provides precise instructions on
what to do in that step. For example:
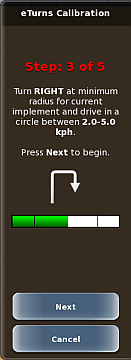
- On steps 1 and 3, press Next to proceed to the next step.
- On steps 2 and 4, MAX automatically proceeds to the next step when finishing calibrating for that step.
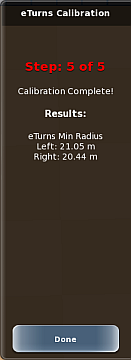
- On step 5, press Done to complete the process.

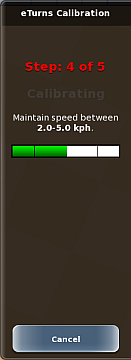
The panels have a speed bar that indicates if you are driving at a speed within a specific range to complete the step. If you are driving too slow or too fast it shows a red bar (below left); if you are driving within the correct range it shows a green bar (below right).
Pay attention to the speed indicator to help guide you through the calibration process, making sure you maintain
your speed within the proper range (green bar) when instructed to do so (steps 2 and 4 above).
When calibration is complete the final calibration step screen (Step 5 of 5) appears, displaying the minimum turning
circles of the vehicle on left and right lock.
After you press Done, the panel closes and you are returned to the Current Implement panel.
3. Press Save. If you have multiple current implements, you are returned to the Current Implements panel.
4. Press Back/Close repeatedly or press the close panel button to close the panel, or press the hide panel button to
hide the panel.