Configuring and Making eTurns
After you complete eTurns calibration you configure eTurns using the two eTurns
panels shown at right. You can change any of these settings in real time to manage
turns individually or leave them as is for each eTurn.
Note: A task must be running and you must be engaged on an A=B line before using
eTurns. If you press the eTurns buttons with no task running or while not engaged on
an A=B line a Help message appears.
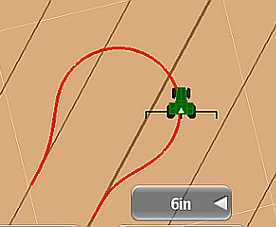
As shown below, a predicted eTurn is what you see on the map screen during setup
before you make the eTurn and the eTurn path is blue. When you make the eTurn
(pressing Go on the eTurns Control panel), the panels close, the screen shows the
eTurn path in red, and the eTurn begins.
- eTurns predicted turn

- eTurns actual turn
To configure and make eTurns (using the table after this procedure as a guide):
1. When eDriveX is ready to engage press the Steering button. The Steering button turns from blue
to green and the eTurns button turns from gray to blue.

2. Press the eTurns button. The first eTurns Setup panel appears, the eTurn path appears on the
map, and the eTurn direction on the map corresponds to green/selected Turn Direction arrow.

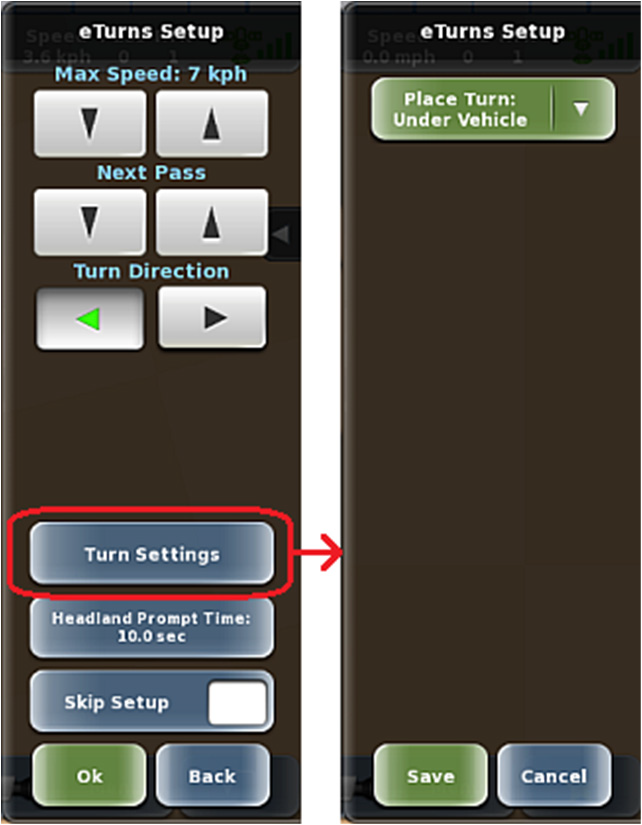
3. Make your selections:
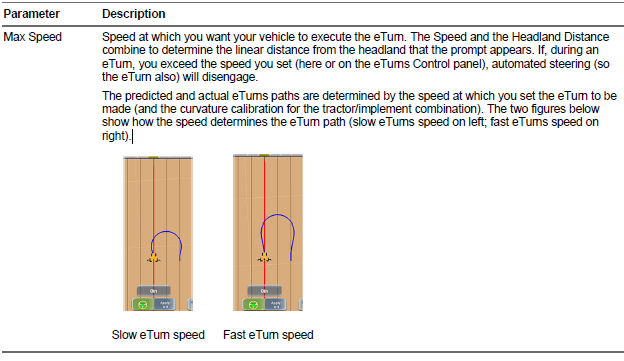
a. Press the Max Speed arrows to decrease (down arrow) or increase (up arrow) the
maximum speed.
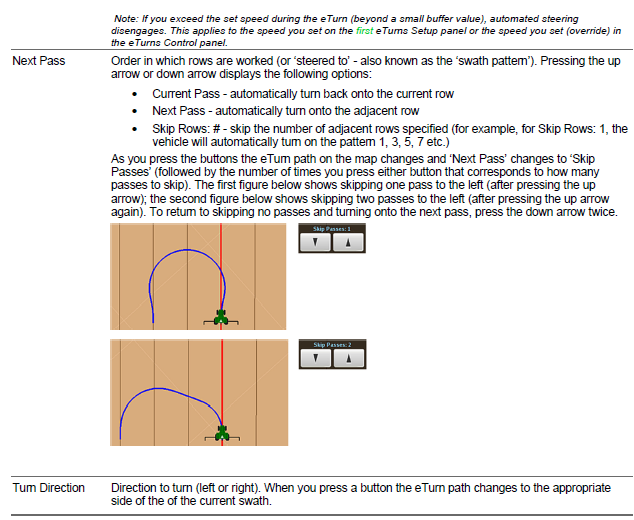
b. Press the middle arrows (labeled ‘Next Pass’ by default) to decrease (down arrow) or
increase (up arrow) the number of passes to skip.
c. Press the Turn Direction arrows to make your eTurn to the left or to the right.
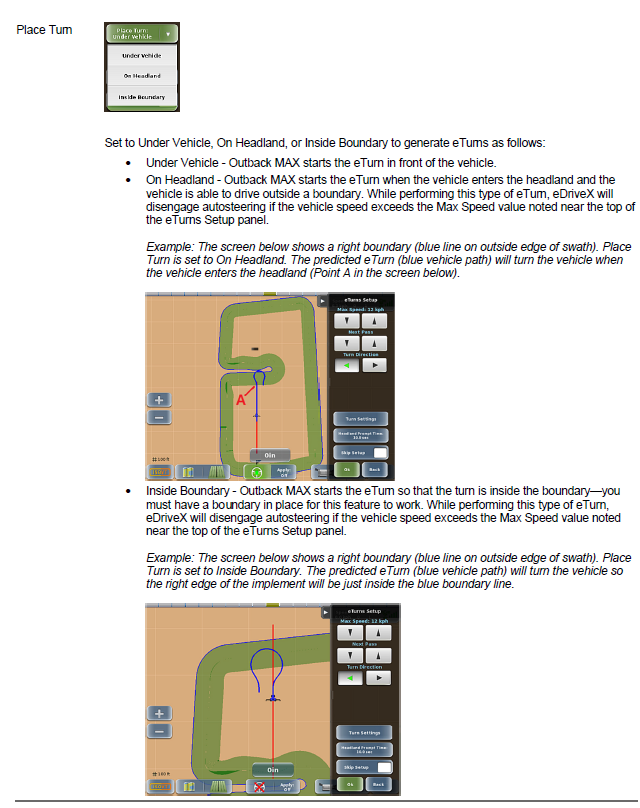
d. Press Turn Settings to display the second eTurns Setup panel, select an option from
the Place Turn drop-down, then press Save to return to the first eTurns Setup panel.
e. Press Headland Prompt Time, enter a time, then press Done.
f. Press Skip Setup so the next time you press the eTurns button on the map screen
Outback MAX skips (does not display) the first eTurns Setup panel and displays the
eTurns Control panel.
4. Press Ok. The eTurns Control panel appears (shown at right).
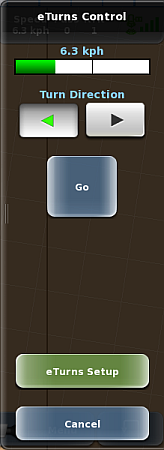
5. Verify an acceptable speed (green speed bar at top of panel) and the correct turn direction, then
press Go. The panels close and you begin making the eTurn.
- During the eTurn the eTurn button (bottom right of map) is disabled.
- When the eTurn is completed, the eTurn button is enabled so you can perform the next
eTurn.
6. Repeat 2-5 as needed.

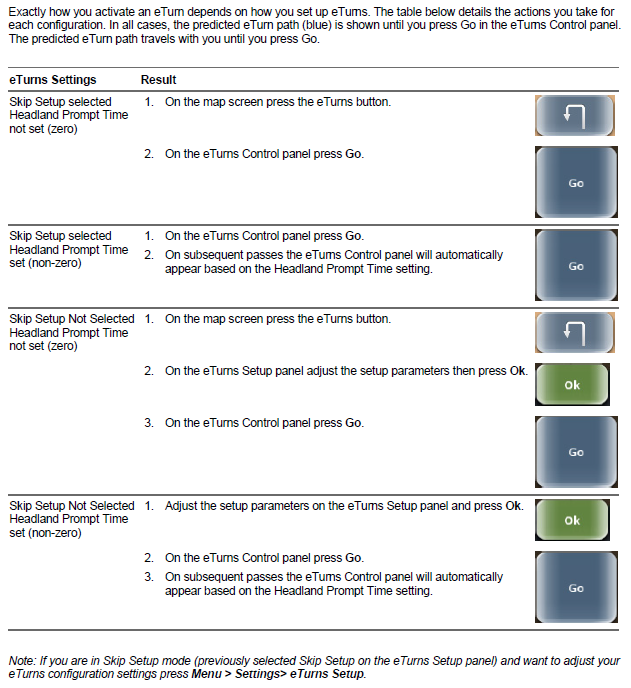
eTurns Settings and Resulting Actions