Creating a Task
This topic covers creating a task by creating/selecting the parameters that make up a task. Alternatively, you can create a task by copying an existing task (using some or all of the parameters of the existing task). See the following topic for instructions on copying a task.
Before creating a task, you must have at least one vehicle and one implement. See the following topics for more information:
A created task has an 'initial' status; you have to manually start (run) a task. See the following topic for more information.
New Task and Task List
To create a task:
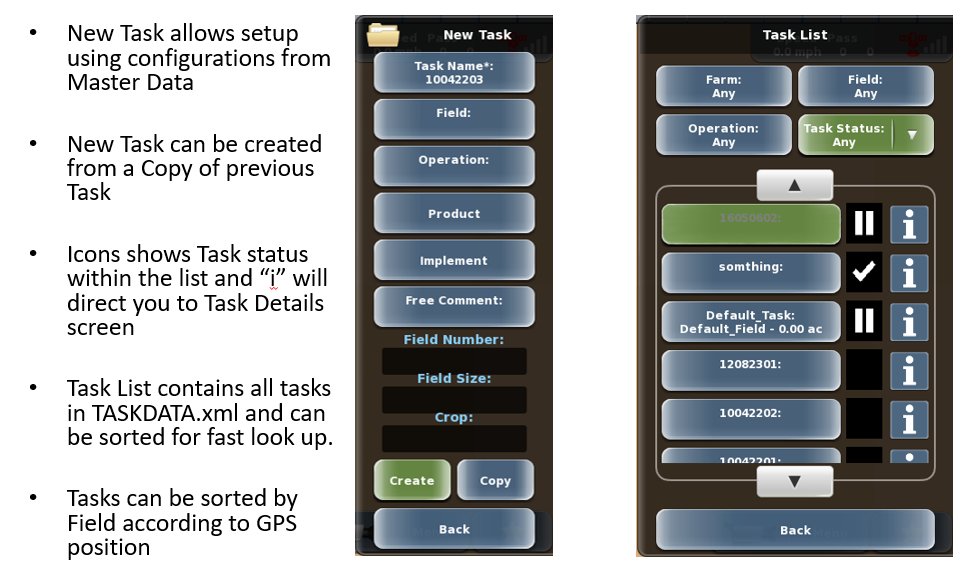
1. Press Menu > Tasks > New Task. The New Task panel appears.
Use the diagram below and the text that follows to enter/select parameters for the task.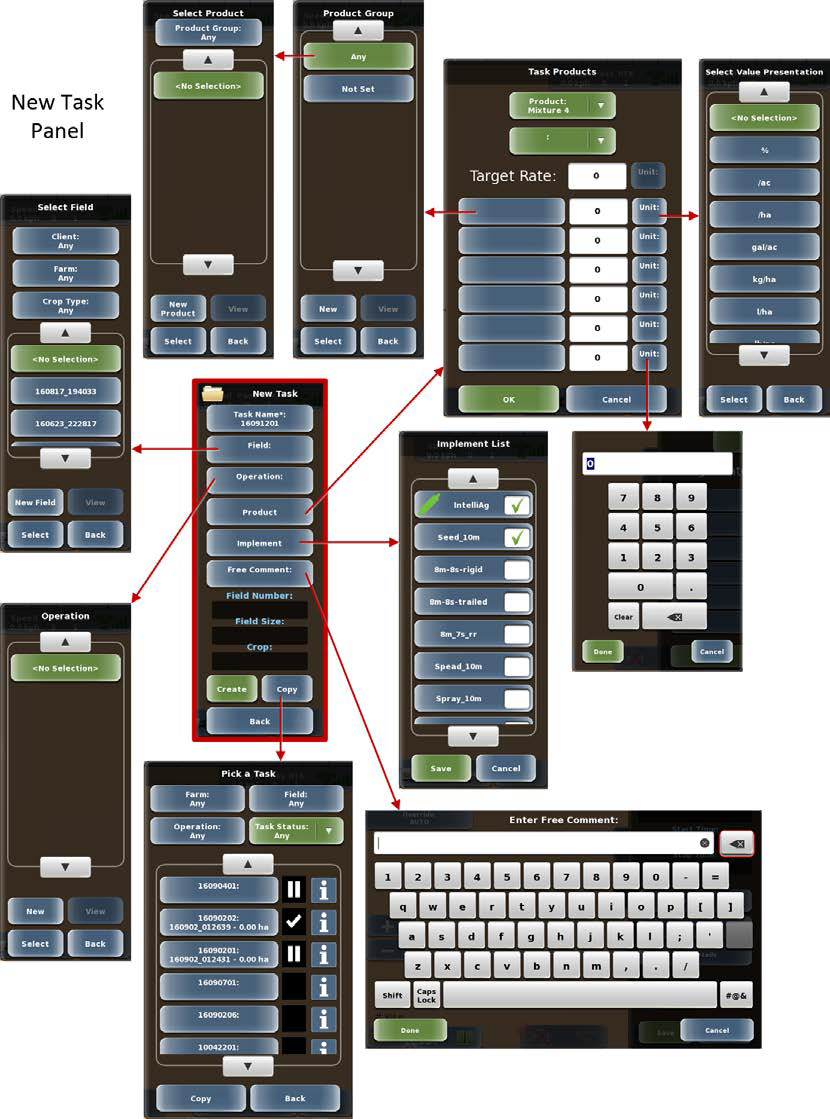
2. Task Name: MAX automatically creates a task number as the task name. To change the name, press Task Name, type a new name in the Enter Task Name window, then press Done.
For items that you can select from a list or create new (such as Field in step 3 below), see the following topic for an example:
3. Field: Press Field to display the Field panel, then perform either of the following:
• Select an existing operation from the list (you can use the Client, Farm, or Crop Type buttons to filter the list). If you set up master data, you would typically use this option.
• Press New Field, enter/select parameters for the field on the New Field panel, then press Create.
4. Operation: Press Operation to display the Operation panel, then perform either of the following:
• Select an existing field from the list. If you set up master data, you would typically use this option.
• Press New, enter a Name for the operation on the New Operation panel, then press Create.
5. Product: Press Product to display the Task Products panel, where you assign products and mixtures to implements when starting a task.
• Select a mixture from the Product drop-down (top green button).
• Select a device element (such as a boom) from the second green drop-down
• Press the Target Rate (white) box, enter a value, then press Done. The target rate populates Rate 1 on the Product Rate menu.
• (Optional) Component rates (six rates below the Target Rate) are for record keeping purposes.
6. Implement: Press Implement to display the Implement List panel, press an implement to select it (a green check mark appears in the white box) repeating as needed for additional implements (for example, you may have two implements connected - a tiller and a seeder), then press Save.
7. (Optional) Free Comment: Press Free Comment, type a text comment, then press Done. Use this parameter for a short note you want associated with the task.
8. Press Create. A message appears asking if you are sure you want to make this new task the current task. Press Yes. Additionally, if the current task was running, a message appears asking if you want to pause or finish the current task. Press Pause or Finish accordingly.
9. Press Back/Close repeatedly or press the close panel button to close the panel, or press the hide panel button to hide the panel.