The starting point for tasks is the Tasks panel, shown at right. The topics below provide overviews of the Tasks panel and other task-related panels available from the (top level) Tasks panel. Review these topics to familiarize yourself with the task panels and screens before working with tasks.
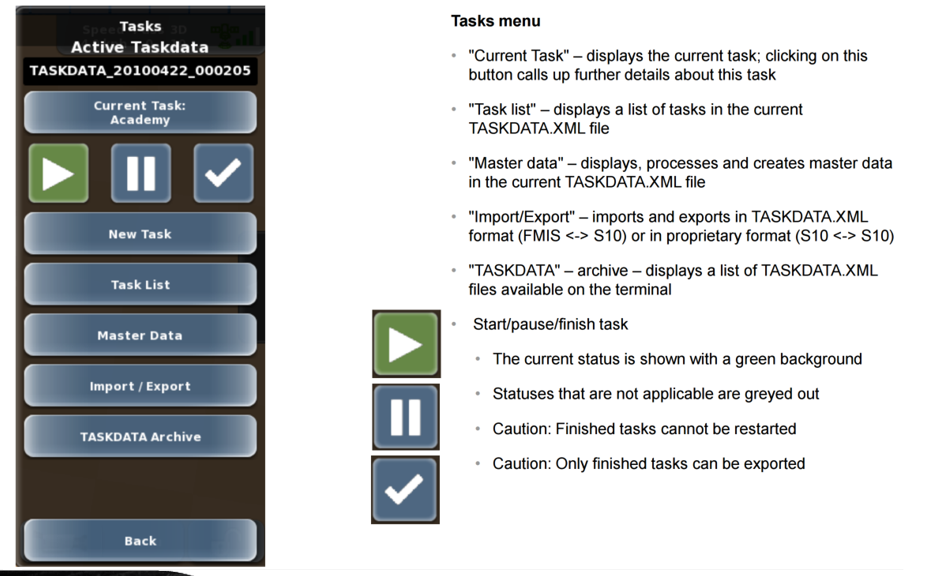
Tasks Panel Overview
The main Tasks panel is your starting point to:
• Create a new task, copy an existing task, and load (activate or make current) an existing task
• Start, pause, and finish a task
• View/edit task information and task master data
• Activate and delete a TASKDATA file
• Import/export task data
Review the diagram below to familiarize yourself with where the buttons on the Tasks panel (red border below) take you.
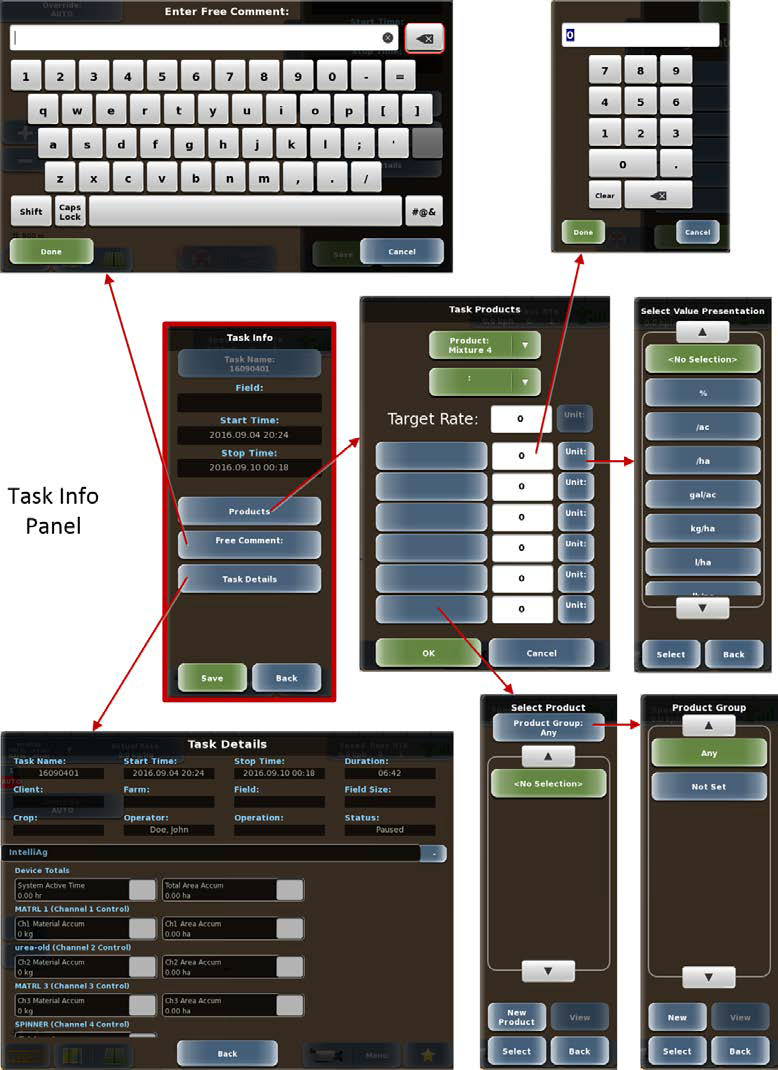
Task Info Panel Overview
The Task Info panel is your starting point to the following for the current task:
• View/set product information for the task
• Enter/edit a text comment for the task
• View task details (you can select up to three items on the Task Details screen to appear below the task number/name on the Indicator panel)
Review the diagram below to familiarize yourself with where the buttons on the Task Info panel (red border below) take you.
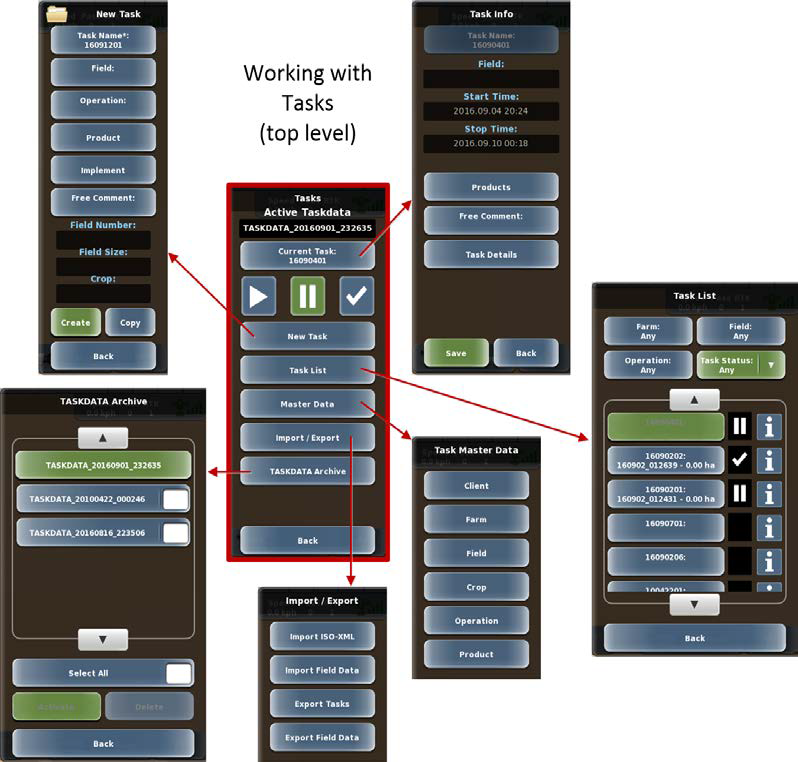
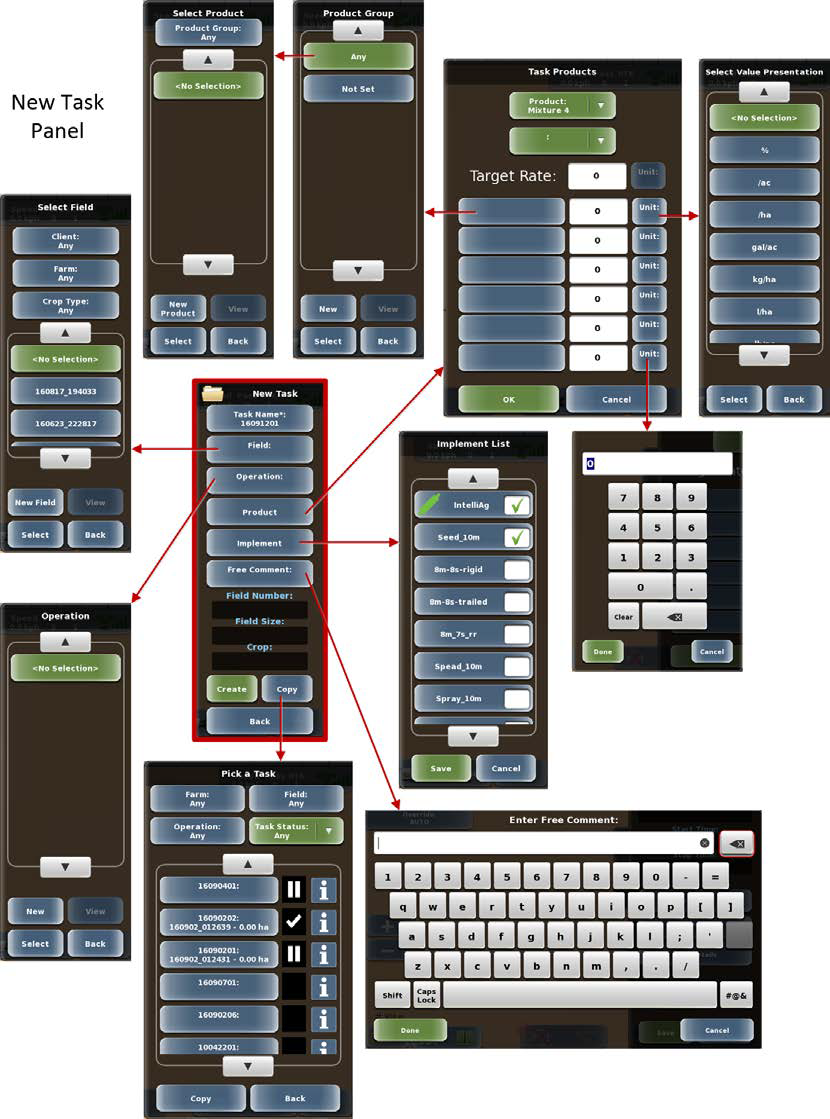
New Task Panel Overview
The New Task panel is your starting point to create a new task. Review the diagram below to familiarize yourself with where the buttons on the New Task panel (red border below) take you.
Note: Pressing the Task Name (top) button on the New Task panel displays a data entry window to edit the auto-generated task number.
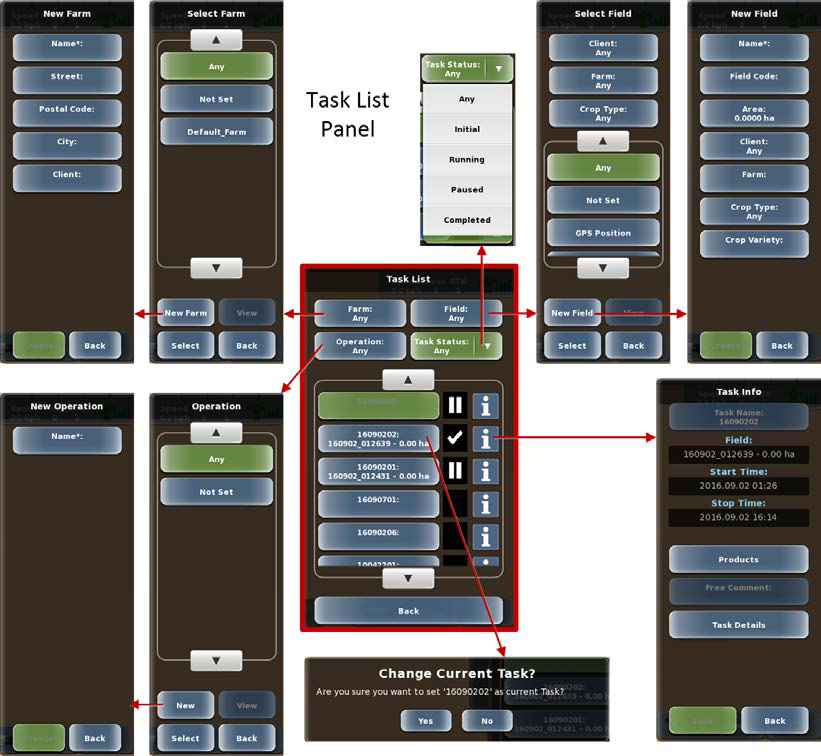
Task List Panel Overview
The Task Info panel is your starting point to:
• Filter the task list by Farm, Field, Operation, and/or Status.
• Create new Farm, Field, and/or Operation.
• Display task information (Task Info panel) for any listed task.
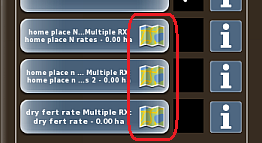
Note: If a task has a loaded prescription map, a map symbol appears on the task button (shown below):
• View the status (initial, running, paused, or finished) of a task in the list. See the following topic for more information on task status:
Review the diagram below to familiarize yourself with where the buttons on the Task List panel (red border below) take you.
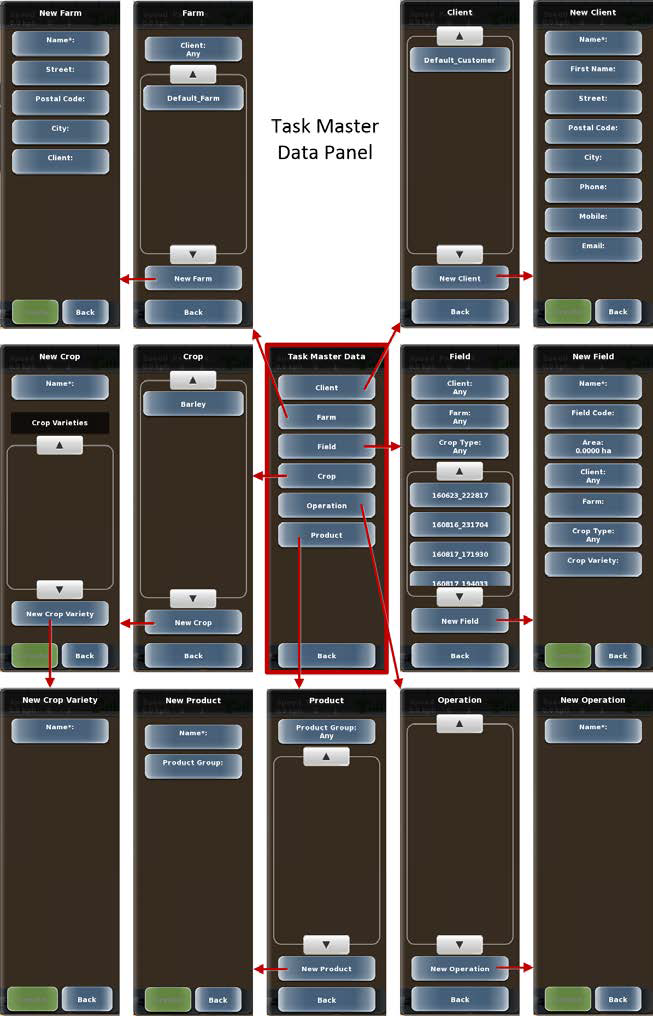
Task Master Data Panel Overview
This topic provides a brief overview of the Task Master Data panel. For detailed instructions on setting (entering) task master data, see the following topic:
The Task Master Data panel is your starting point for data management setup so you can access it quickly when creating a task.
Note: If you do not require data management, you can skip setting up master data and default settings will be used in all cases.
Review the diagram below to familiarize yourself with where the buttons on the Task Master Data panel (red border below) take you.
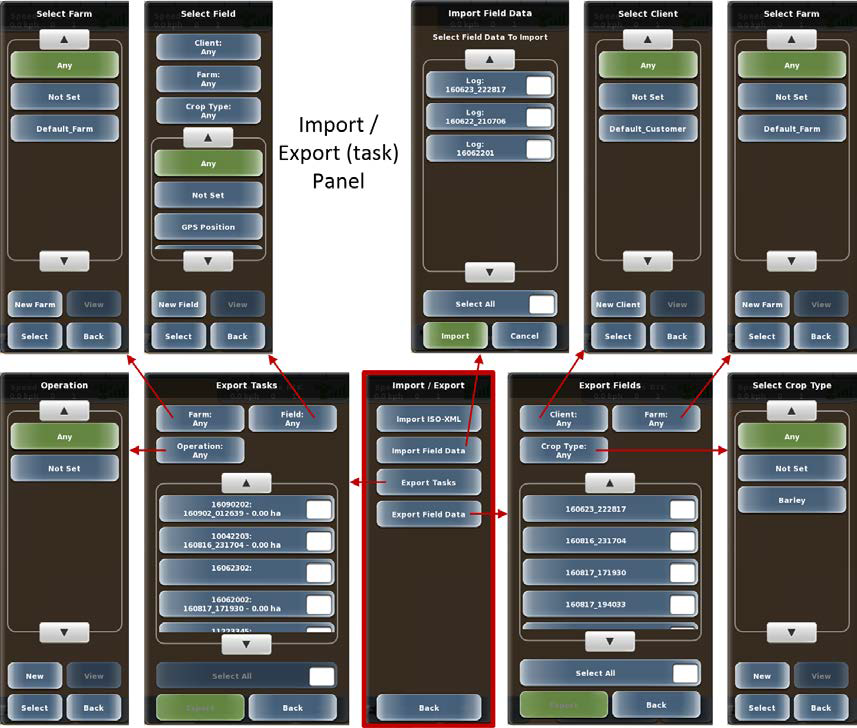
Task Import/Export Panel Overview
The Import / Export panel is your starting point to:
• Import and export field data
• Export tasks
• Import a TASKDATA file (see Note below)
You must have a USB drive inserted in one of the USB ports on the terminal to enable the buttons on the Import / Export panel. Additionally, the USB drive must contain a TASKDATA folder (and associated files) for the Import ISO-XML (top) button to be enabled.
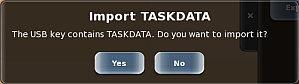
Note: When you insert a USB drive with a TASKDATA folder into the terminal, MAX automatically detects the TASKDATA file and displays the following message. Press Yes to import, No to cancel. If you press No and navigate to the Import / Export panel in the diagram shown below, you can use the Import ISO-XML button to import the TASKDATA file. Make sure you want to import the file because pressing the button imports it (there is no Yes/No confirmation message).
Review the diagram below to familiarize yourself with where the buttons on the Import/Export panel (red border below) take you.