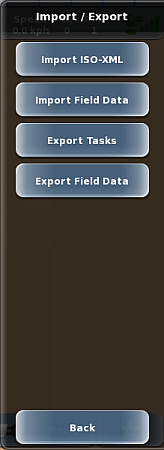
Use the Import / Export panel (at right) to import and export various task-related data.
To display the Import / Export panel, press Menu > Tasks > Import / Export.

Importing a TASKDATA File
You must have a USB drive inserted in one of the USB ports on the terminal to import a TASKDATA file. There are two ways to import a TASKDATA file:
• Confirming the import upon inserting the USB drive.
• Using the task Import / Export panel to import the file. You may want to use this method if, for example, you are not ready to import the TASKDATA upon inserting the USB drive but want the ability to do so later.
Both methods are described below.
To import a TASKDATA file upon inserting the USB drive:
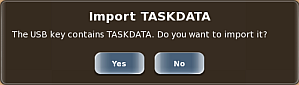
1. Insert the USB drive containing TASKDATA into the terminal. After a few seconds MAX displays the following message.
2. Press Yes to import the file. MAX displays the following status message during the import.

To import a TASKDATA file using the Import / Export panel:
1. Insert the USB drive containing TASKDATA into the terminal. After a few seconds MAX displays the following message.
2. Press No to cancel the import.
3. Press Menu > Tasks > Import / Export. The Import / Export panel appears (shown at right).
Note: Before performing the next step, be aware that MAX does not display an import confirmation (Yes/No) message upon pressing Import ISO-XML.
4. Press Import ISO-XML. The panels close and MAX displays the following status message during the import.

Attached is a blank TASKDATA file for download if needed.
Importing and Exporting Field Data
When you import/export field data, you are actually importing/export jobs (log files) from a MAX software version that used jobs instead of tasks. Importing enables you to import field data from the jobs, while exporting enables you to use field data (as job log files) in a different MAX terminal that supports jobs.
To import field data (logs):
1. Insert a USB drive into the terminal. If the following message appears (because the drive contains a TASKDATA folder) and you are not importing TASKDATA, press No.
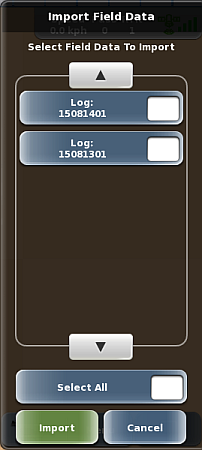
2. Press Menu > Tasks > Import / Export > Import Field Data. The Import Field Data panel appears.
3. Use the up/down scroll buttons to scroll through the list of logs (if necessary) then select the logs you want to import. If you want to import all logs press Select All.
4. Press Import. You are returned to the Import / Export panel and an importing (jobs) status message appears briefly.
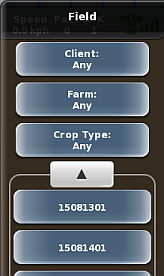
To verify the logs have been imported as field data, press Menu > Tasks > Master Data Field to display the Field panel, then scroll through the list until you see the fields created from the imported jobs:
To export field data (log files):

1. Insert a USB drive into the terminal. If the following message appears (because the drive contains a TASKDATA folder) and you are not importing TASKDATA, press No.

2. Press Menu > Tasks > Import / Export > Export Field Data. The Export Field Data panel appears (shown at right).
3. Use the up/down scroll buttons to scroll through the list of logs (if necessary) then select the logs you want to import. If you want to export all logs, press Select All.
4. Press Export. You are returned to the Import / Export panel, an exporting status message appears briefly, followed by a message that exporting field data is complete (see below).
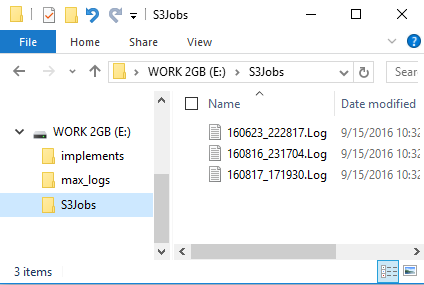
The files are exported to an S3Jobs folder on the USB drive and should appear similar to below:
Exporting Tasks
You can export only completed tasks and this applies to all completed tasks in all TASKDATA files; thus, you can select which tasks to export.
When you export tasks you are actually exporting a new TASKDATA file, one made up of all the tasks you selected to export.
Caution: Exporting TASKDATA file to a USB drive that already has a TASKDATA file overwrites the existing TASKDATA file. You cannot retrieve an overwritten TASKDATA file.
To export tasks:
1. Insert a USB drive into the terminal.
2. Verify no tasks are running. If you try to export tasks with a task running, the Export Tasks button is disabled.
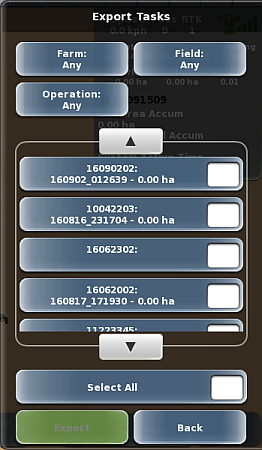
3. Press Menu > Tasks > Import / Export > Export Tasks. The Export Tasks panel appears.
4. (Optional) To filter the list, press Farm, Field, or Operation to display a panel showing all related items from which you can select. For example, press Farm to display the Select Farm panel, press an item in the list, then press Select. You are returned to the Export Tasks panel and the list shows only those farms based on your selection (the selection appears on the Farm button).
5. Use the up/down scroll buttons to scroll through the list of tasks then select the tasks you want to export. If you want to export all tasks in the list press Select All.
6. Press Export. An exporting status message appears briefly followed by a message that exporting is complete (see below).
7. Press OK.
8. Press Back/Close repeatedly or press the close panel button to close the panel, or press the hide panel button to hide the panel.